

A MySQL database stores information for applications like WordPress, online stores, or forums. In this article you will see how to create a database with its user in cPanel, and how to import and export it with phpMyAdmin.
What is it for?
- Create the database needed by a manually installed application.
- Upload a database that you have on your computer to hosting, for example when migrating a site.
- Download a copy of the database before making changes.
Access: log in to cPanel from the client portal → Log in to cPanel, or at https://yourdomain.com/cpanel. All options in this article are in the Databases section.

Create a database
- Click on MySQL Databases.
- Under Create New Database, type a name and click Create Database.
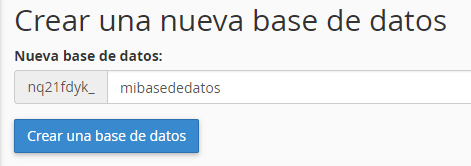
- Return to the previous screen. The database appears under Current Databases with its full name: cPanel adds the account username as a prefix, for example
username_store.

Create the user and assign it
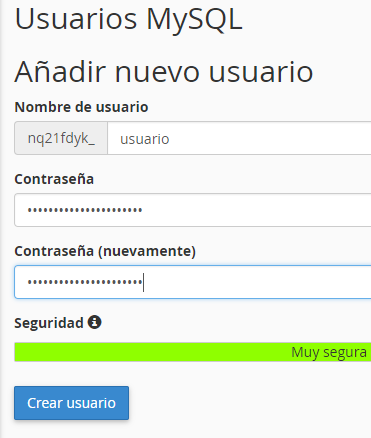
- Under Add New User, type a username and a secure password. You can use the Password Generator. Then click Create User. Just like the database, the user carries the account prefix.
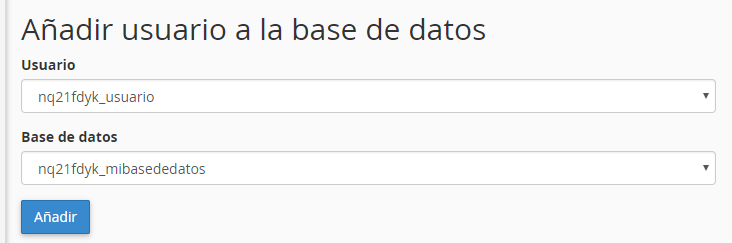
- Under Add User to Database, choose the user and the database from the dropdowns and click Add.
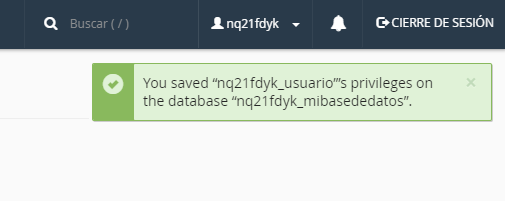
- Check ALL PRIVILEGES and click Make Changes.
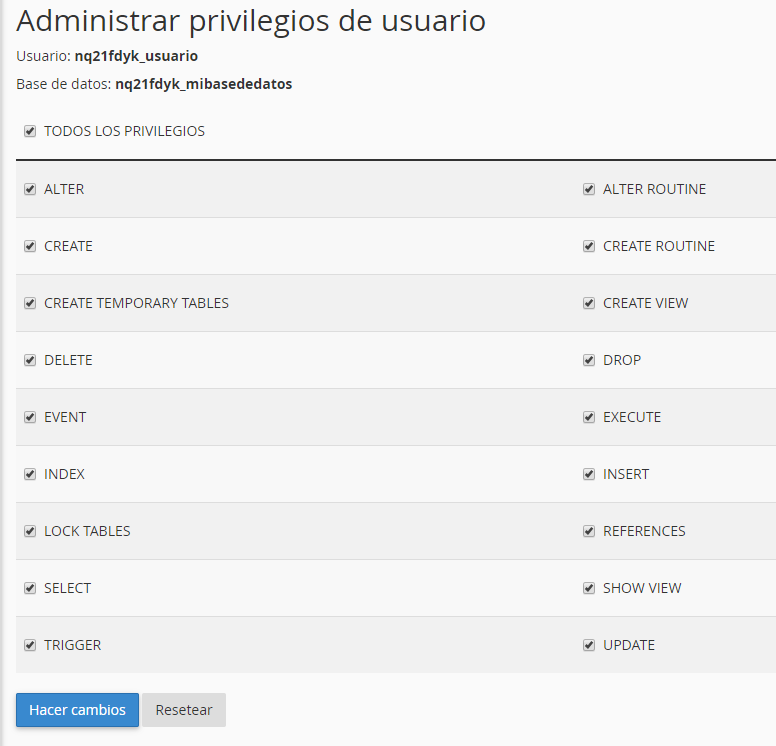
A notice confirms that the changes were applied.
Data to connect your application: server localhost, the full database name (with prefix), the full user name (with prefix) and its password.
Import a database
Before importing, you need an empty database created with the previous steps.
- In the Databases section, open phpMyAdmin.
- In the left panel, click on your database name and then on the Import tab.

- Click Choose File and select the file from your computer.
.sql,.sql.gzand.sql.zipare accepted. Below the button is the maximum allowed size. - Click Import at the bottom of the page. In older versions of phpMyAdmin, the button says Go.

If everything went well, a green message appears and the tables are visible in the left panel.

Export a database
- In phpMyAdmin, click on your database name and then on the Export tab.
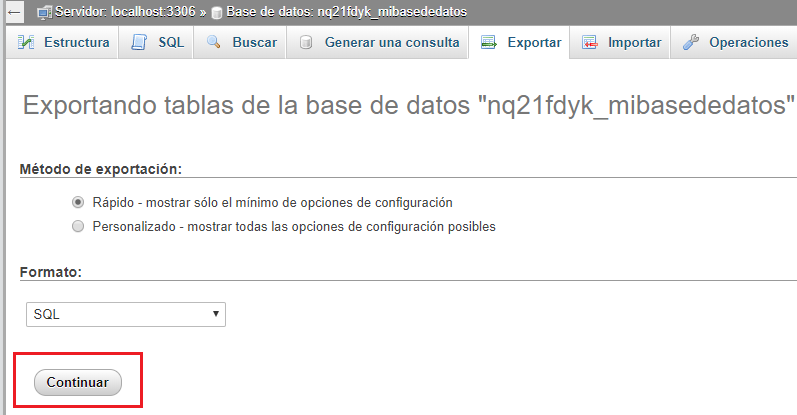
- Leave the Quick method and the SQL format.
- Click Export (or Go, depending on the version). The browser downloads a
.sqlfile.

Important: importing into a database that already has tables can cause errors or overwrite data. Export a copy before importing over a database in use. Databases also occupy disk space of the service.
Frequent issues
- The application does not connect to the database: check that you use the full names with prefix, the
localhostserver, and that the user is assigned to the database with all privileges. - The file exceeds the maximum import size: compress it into
.sql.gzor.sql.zip. If it is still large, open a ticket so that support can import it. - Error "#1044 Access denied" when importing: the file attempts to create a database with another name. Remove the
CREATE DATABASEline and theUSEline from the file, and import it inside the database you created. - Error "#1050 Table already exists": the database was not empty. Use a new database or delete the existing tables, after exporting a copy.
- I cannot create more databases or I am running out of space: you reached the limit of the service. You can upgrade your service by consulting the sales department from the client portal or the online chat.
If you need help with your database, open a ticket from the client portal or consult through the site's online chat.