

This article explains how to enable or remove restricted access in your hosting directories using Directory Privacy in cPanel, so only authorized users can view the content.
What is it for?
A password-protected directory limits access to certain content to a group of users defined by you. It is useful for:
- Sharing private files with clients or colleagues.
- Restricting a temporary administration area.
- Publishing information that should not be accessible to the general public.
Access: Log in to cPanel from the client portal → Log in to cPanel, or directly at https://yourdomain.com/cpanel.
Enable restricted access
- Log in to cPanel.
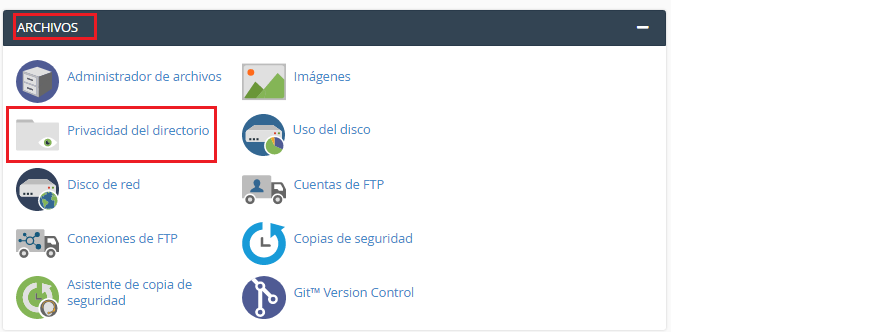
- Go to Files → Directory Privacy (Directory Privacy).
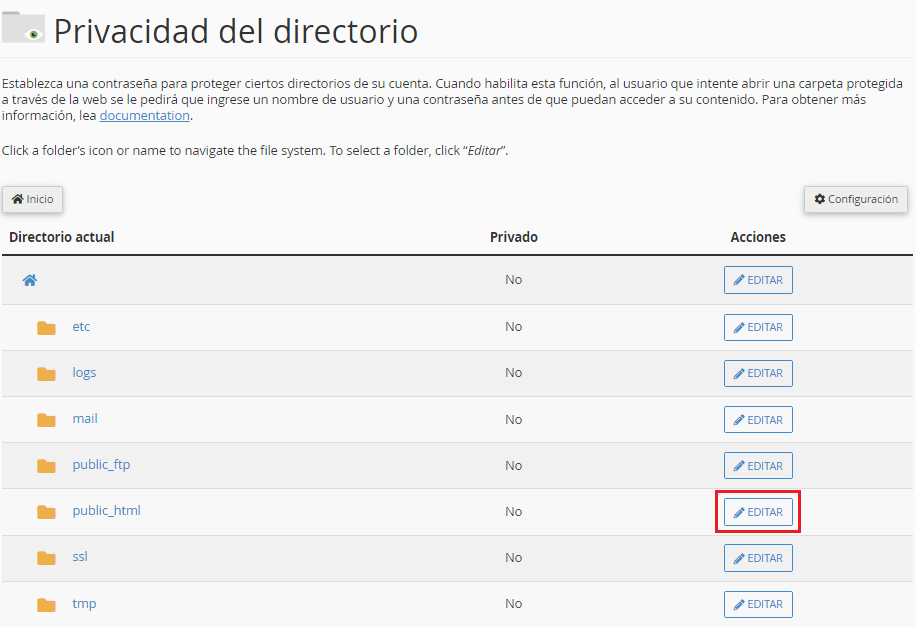
- In the folder list, choose the directory to protect and click Edit.
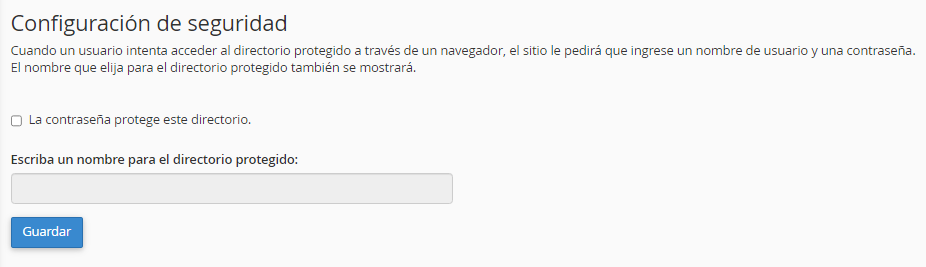
- Check the box Password protect this directory.
- In Enter a name for the protected directory, enter a description that visitors will see when authenticating (e.g. Restricted area, Authentication required, Client area).
- Click Save.
Create authorized users
Protecting the directory is not enough: you must create at least one user with a password so they can log in.
- In the same screen of the protected directory, look for the section to create user.
- Fill in Username and Password (you can use the cPanel generator).
- Click Save or Create.
You can add multiple users to the same directory if you need to.
Important: The protection applies to the chosen directory and, by default, also to its subfolders. Do not protect the entire public_html if you want the main site to remain public; choose a subfolder (e.g. public_html/private).
Remove restricted access
- Log in to cPanel → Files → Directory Privacy.
- Choose the directory from which you want to remove protection.
- Uncheck the box Password protect this directory.
- Click Save.
The directory becomes publicly accessible again. Users created for that directory cease to have effect, although you can delete them manually if you no longer need them.
Common issues
- It asks for a password but I don't have a user: create an authorized user in the corresponding section of the protected directory.
- The password doesn't work: verify username and password; try creating a new user.
- The whole site asks for a password: you probably protected
public_htmlor a root folder; move the private content to a subfolder and protect only that one. - Authentication loop: clear browser cache or try in a private window.
If you cannot enable protection, the directory does not appear in the list, or restricted access does not work as expected, open a ticket from the client portal or consult via the site's online chat.