
This article explains how to compress and uncompress files and folders from the cPanel File Manager, without installing additional programs on your computer.
Common formats: cPanel mainly allows compressing and extracting .zip files. For other formats (.rar, .7z), uncompress first on your PC and upload the contents.
Accessing the File Manager
- Log in to cPanel from the client portal.
- Go to Files → File Manager.
- Navigate to the folder where you want to work (e.g.,
public_html).
Compressing files or folders
- Select one or more files/folders (Ctrl + click for multiple selection).
- Click on Compress in the toolbar.
- Choose the Zip Archive format.
- Specify the .zip file name and the folder where it will be saved.
- Confirm the operation.
You can also right-click on the selection → Compress.
Useful for: quickly backing up a folder, migrating a small site, or reducing files before downloading them.
Uncompressing a .zip file
- Locate the .zip file in the File Manager.
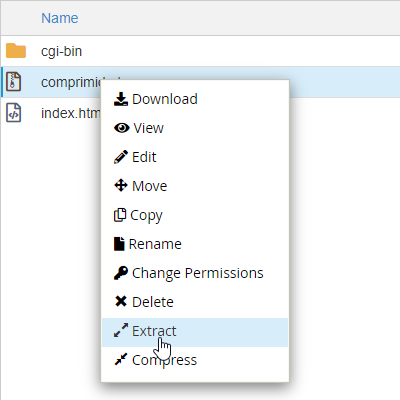
- Right-click on the .zip → Extract.
- Specify the destination folder (e.g.,
public_htmlor a subfolder). - Click on Extract File(s).
Common scenario: uploading an entire site
The File Manager does not allow uploading entire folders, but it does allow .zip files:
- Compress the site on your PC (.zip).
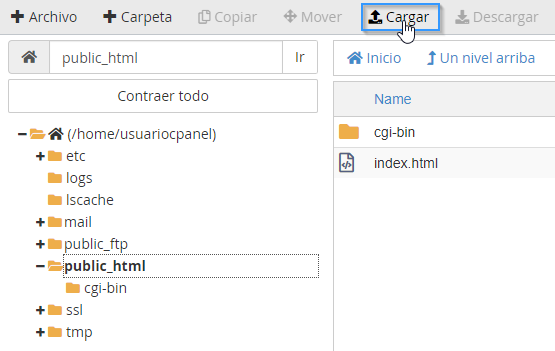
- Upload it using Upload.
- Extract it in
public_html. - Verify that
index.htmlorindex.phpexists in the web root.
Frequent issues
- Extraction failed: the .zip may be corrupt or exceed plan limits; try uploading it again or extract via FTP.
- I can't see the extracted files: check the destination path chosen during extraction.
- The site doesn't load after uncompressing: an extra subfolder may have been left (e.g.,
public_html/mysite/index.html); move the content to the correct root. - Disk full: an uncompressed .zip takes up more space; check your quota before extracting large files.
If compression or extraction fails repeatedly, open a ticket from the client portal or consult via the site's online chat.